Android Module을 개발 완료하였다면 배포방안이 필요하다.
Bintray에 업로드를 하고 JCenter를 연결하여 해결할 수 있다.
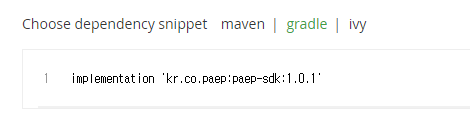
그렇게 되면 아래와같이 dependencies 항목에 추가할 수 있게 된다.
dependencies {
    implementation 'kr.co.paep:paep-sdk:1.0.1'
}
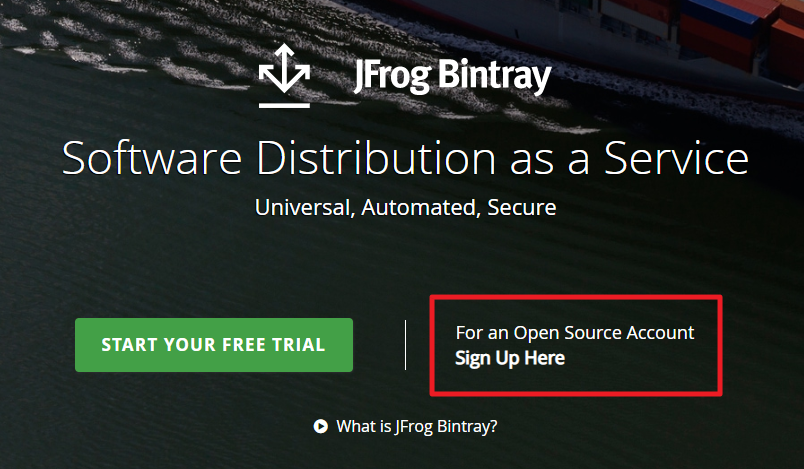
https://bintray.com/ 에 회원가입을 한다.
open source로 가입하도록 한다.
repository를 하나 생성해준다. 이름을 명시해주고, Type을 Maven 으로 선택하였다.

우측상단의 프로필을 선택하여 Edit Profile에 접속하면 API Key를 얻을 수 있다. 기록해두자.
안드로이드 스튜디오에서 gradle 작업을 진행한다.
project build.gradle
buildscript {
    repositories {
        jcenter()
    }
    dependencies {
        classpath 'com.jfrog.bintray.gradle:gradle-bintray-plugin:1.+'
        classpath 'com.github.dcendents:android-maven-gradle-plugin:2.1'
    }
}
module build.gradle
ext {
    bintrayRepo = 'paep'
    bintrayName = 'paep-sdk'

    publishedGroupId = 'kr.co.paep'
    libraryName = 'paep-sdk'
    artifact = 'paep-sdk'

    libraryDescription = 'PAEP adx library'

    siteUrl = 'https://github.com/phaserep/paep-android-sdk'
    gitUrl = 'https://github.com/phaserep/paep-android-sdk.git'

    libraryVersion = '1.0.1'

    developerId = 'jakeyu' // Maven plugin uses this. I don't know if it needs to be anything special.
    developerName = 'Jake Yu'
    developerEmail = 'jake@phaserep.com'

    licenseName = 'The MIT License (MIT)'
    licenseUrl = 'https://opensource.org/licenses/MIT'
    allLicenses = ["MIT"]
}

android {
}

dependencies {
}

apply plugin: 'com.github.dcendents.android-maven'

group = publishedGroupId // Maven Group ID for the artifact

install {
    repositories.mavenInstaller {
        // This generates POM.xml with proper parameters
        pom {
            project {
                packaging 'aar'
                groupId publishedGroupId
                artifactId artifact

                // Add your description here
                name libraryName
                description libraryDescription
                url siteUrl

                // Set your license
                licenses {
                    license {
                        name licenseName
                        url licenseUrl
                    }
                }
                developers {
                    developer {
                        id developerId
                        name developerName
                        email developerEmail
                    }
                }
                scm {
                    connection gitUrl
                    developerConnection gitUrl
                    url siteUrl

                }
            }
        }
    }
}

// Bintray section
// As long as you add bintray.user and bintray.apikey to the local.properties
// file, you shouldn't have to change anything here. The reason you
// don't just write them here is so that they won't be publicly visible
// in GitHub or wherever your source control is.

apply plugin: 'com.jfrog.bintray'

version = libraryVersion

if (project.hasProperty("android")) { // Android libraries
    task sourcesJar(type: Jar) {
        classifier = 'sources'
        from android.sourceSets.main.java.srcDirs
    }

    task javadoc(type: Javadoc) {
        excludes = ['**/*.kt']
        source = android.sourceSets.main.java.srcDirs
        classpath += project.files(android.getBootClasspath().join(File.pathSeparator))
    }
} else { // Java libraries
    task sourcesJar(type: Jar, dependsOn: classes) {
        classifier = 'sources'
        from sourceSets.main.allSource
    }
}

task javadocJar(type: Jar, dependsOn: javadoc) {
    classifier = 'javadoc'
    from javadoc.destinationDir
}

artifacts {
    archives javadocJar
    archives sourcesJar
}

Properties properties = new Properties()
properties.load(project.rootProject.file('local.properties').newDataInputStream())

bintray {
    user = properties.getProperty("bintray.user")
    key = properties.getProperty("bintray.apikey")

    configurations = ['archives']
    pkg {
        repo = bintrayRepo
        name = bintrayName
        desc = libraryDescription
        websiteUrl = siteUrl
        vcsUrl = gitUrl
        licenses = allLicenses
        publish = true
        publicDownloadNumbers = true
        version {
            desc = libraryDescription
            gpg {
                // optional GPG encryption. Default is false.
                sign = false
                //passphrase = properties.getProperty("bintray.gpg.password")
            }
        }
    }
}
ext 항목만 설정해주면 되고,
bintray.user and bintray.apikey 는 local.properties 에 작성해서 사용하면 된다.
만약 모듈을 kotlin으로 작성하였다면
task javadoc(type: Javadoc) {
excludes = [‘**/*.kt’] source
}
이렇게 코틀린 .kt 도 포함시켜줘야 javaDoc오류가 발생하지 않을 것이다.
완료되었다면 안드로이드 스튜디오의 우측에 있는 Gradle탭을 선택한다.
Project > module > Tasks > publishing > bintrayUpload 더블클릭하여 실행해주면 bintray 로 업로드가 진행된다.
bintray.com 에 접속해보면 업로드가 되어있는것이 확인되고, Add to JCenter 버튼을 클릭하면 링크해달라는 요청을 보내는 화면이 나타난다.
comments에 뭐 작성할필요는 없으며 Send 버튼을 눌러서 요청을 보낸다.
그러면 빠르면 10분~ 늦어도 1일 후에는 답변이 온다.
https://bintray.com/beta/#/inbox 에서 답변 확인을 하면 된다.
Your request to include your package /phase/paep/paep-sdk in Bintray's JCenter has been approved.
이렇게 오면 완료가 된것이다.
완료 후에 패키지에 접속해보면
이렇게 사용할 수 있게 된다. 그럼 완료!